A Basic Spy Guide – by Billie Joe
Since Team Fortress 2 went Free-to-Play, most new players are fascinated by the Spy class and fill up teams with 5-6 spies (And some servers now limit this class to 2 per team). However, most rookies have some common problems:
- Using Ambassador (Without knowing how to headshot), Your Eternal Reward, C&D and sit in the corner of the map for 5 minutes or whatsoever ‘Waiting for the right moment to strike’.
- Attempts to poke people in the face and backstab sentries.
- Misuse of Dead Ringer and always get caught while decloaking.
Of course there are a lot of other problems, the above problems are only a few. In light of the above, I am going to talk about the ins and outs to become a spy that your teammates love and your enemies fear.
Section 1: Settings
Before we look into the criteria to become a team-friendly spy, there are some settings in the ‘Options’ button that can help you to play as a spy. Firstly, press ‘Options’ and search for the ‘Advanced…’ button. There are two boxes, check them all. This allows you to switch weapons by pressing the number (1,2,3) on the keyboard directly. Second, press ‘Adv. Options’ in the main menu. For the ‘Combat Options’, check box number 2 and 3. For the ‘HUD Options’, drag the bar for ‘Viewmodel field of view’ from 54.00 to 70.00. The above enables you to do a ‘Stab and Sap’ technique more easily, and it helps your gameplay generally.
Section 2: Your Role
The basic role as a spy is to kill high-value targets, such as ÜberCharge ready Medics, Heavies, Snipers, and any good players. Also, building (Sentry) destruction is also a vital job for spies to help their team to advance safely or to harass the advancing team even more. And good spies will use the Revolver to pick off injured enemies from a distance. You know that spies can know the name and the health of an enemies by aiming at him? Using this unique ability (Medics can also do this by equipping The Solemn Vow), you’ll know the health of the enemy and decide whether you should keep on fighting or escape. Also, this ability enables more experienced spies to hunt down good players (Using their names). Target prioritization is also the key to play as a good spy. Although ultimately you want to kill all the enemy players, you’ll know whether you should backstab a overhealed Heavy or a burning Scout when you can only strike once. Here’s a typical target prioritization list, although you should kill according to the different situations:
Medic, Good Engineer, Heavy> Soldier, Demoman, Pyro, Sniper> Scout, Spy
And, Pro players = Mediocre players >>>>>>> Newbies.
Which means, follow the class proirities if your potential victim are mediocre or pro, but refer to the player level priority if one of your potential victim is a newbie.
So, in conclusion, the Spy’s job is to kill high-value targets (By target prioritization), building destruction and pick offs.
Section 3: Your Arsenal
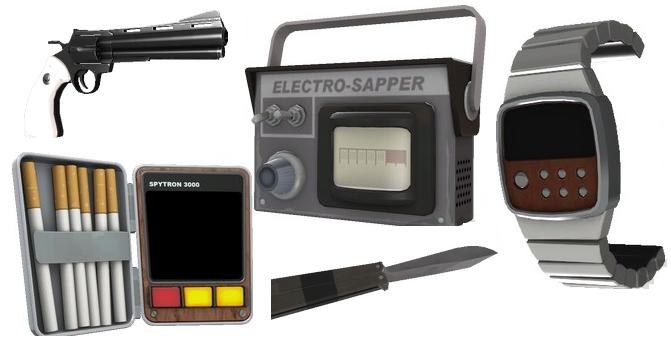
Every spy starts with a set of weapons: A Revolver, a Sapper, a Knife, a Cloaking Device and a Disguise Kit. You should experience by yourself to see which one suits you best. For me, I prefer to use the Ambassador (If you can’t headshot under pressure, use the Revolver), the stock Knife (Or maybe the Kunai) and the Dead Ringer. This is by far the best all-rounded set for a Spy, however you should change your arsenal according to different situations.
Section 4: Operation… Operation
In the following, I am going to introduce the basic spy routine for my set.
Part 1: Feign Death
This part is very easy. Just walk to a combat area (disguised or undisguised but never disguising) with your Dead Ringer out. You should be able to trigger the Dead Ringer within seconds and you can move your way behind enemy lines. Alternatively, you can pull out your Revolver to help you team out a bit, and pull out the Dead Ringer when you are spotted. NOTE: Don’t receive damage from the flamethrowers as it is very likely for the Pyro to lit you up after you activate your feign death.
Part 2: Go behind enemy lines
Due to massive random spamming in Hong Kong servers, the Dead Ringer makes this part easy. You should ONLY disguise/change your disguise during this short standard 6.5-second jog. Avoid Pyros at all costs.
Part 3: Decloaking
There are certain things that are important in this part. Firstly, the Dead Ringer has a loud and distinctive decloaking sound, so try not to decloak near an enemy. Also, the Dead Ringer cloak meter drops to 40% if above that amount when uncloaking, so here goes rule number 1:
DECLOAK NEXT TO AN AMMO SOURCE.
I’ll make myself clear, what you need to do is to decloak first, then take the ammo source, but not the way round. In that case, after your decloak, your cloak drops to 40%, but after taking the ammo source, your cloak rises to 75% or above immediately. This helps you to survive easily.
However, it is advised that you should scan your surrounding before decloaking. If spy-consoius players are near your original decloak position, extend your cloak and decloak elsewhere unless you want to go to the toilet while you are waiting for respawn.
Also, it is advised that during decloaking, you should turn around with your revolver out. If you are caught while you are decloaking, you are telling your enemies that you are an obvious spy. They WILL start killing you immediately, therefore you can fight back immediately with your revolver.
If you are detected during decloaking. Look for the part ‘Survive’. If not, move to the next part.
Part 4a: Approach your victim(s)
This is the part that can help people distinguish good spies and bad spies. In this part, what you need to do is to utilize your disguise to approach your victim safely, which means, you need to act like your enemy. The appropriate use of disguises is key. If you decloak way behind enemy lines, use the Sniper disguise. If you decloak somewhere in the middle or the front, use the Demoman or the Pyro disguise. The Spy disguise works well in any range though. After you disguise, you need to act like you are the teammate of your enemy, which means:
General:
- (Highly recommended) Pull out the player’s secondary weapon all the time.
- DON’T look directly at your enemy’s back, look at the position of your real teammates instead.
- Try to look up.
- (Really useful) Pretend to spy-check by turning your back regularly.
- Call for enemy medic only when your disguise’s health is medium to low.
- Pretend to switch weapons and reload if you have the time. (Reloading your revolver will mimic the reload action of the weapon your disguise is holding if the weapon is able to reload)
Sniper:
1. Crouch to mimic sniping.
2. Hold out his Machete (By pressing ‘B’ with your melee out) and pretend to spy-check.
Spy:
1. Hold out his Knife.
2. Take alternate routes.
Demoman:
1. If it’s a Demoman, hold out his Grenade Launcher or the Stickybomb Launcher. (By pressing ‘B’ with your sapper out)
2. If it’s a Demoknight, hold out his melee weapon.
Pyro:
1. Switch between the primary and secondary weapons.
2. Act like a spy-conscious Pyro.
Of course, every disguise has its own pros and cons, feel free to try out different disguises. The rule of thumb is that you need to act like that class. This can avoid most of the spychecks. However, no matter how good your acting is, most good players will spycheck every teammate they see. You can say people are ‘motion sensitive’. To know when to fight back is important. Sometimes, it is wise to keep acting if the spychecker is not accurate with his weapons or you have enough health to survive the spycheck. If you are bumped, pushed away by the Pyro’s Compression Blast, on fire, caught while disguising or don’t have the enough health to survive the spycheck, return fire immediately and activate your Dead Ringer wisely.
If you can approach your victim(s) safely, move to the next part. If you blow your cover, look for the part ‘Survive’.
Part 5a: Stab Stab Stab~
This part, surprising, is far from difficult. In fact, it is one of the most easiest part playing as a spy. What you need to do is to press on your left button using your index finger. Repeat this action if necessary. However, it is important to know the backstab range. The knife has the range of a regular melee, and a backstab will occur if the Spy is within a 180° range behind or underneath the enemy, and on the top of the enemy, crouching and facing at the same direction.
After your happy stabbings, your disguise will be dropped (This occurs when you attack, using either the revolver or the knife), and it’s very likely for the enemy to chase you down. If that occurs, move to the part ‘Survive’. If you are not discovered after killing/stabbing an enemy, disguise and repeat Part 4.
Part 6: Survive
This is uttermost the most difficult part for playing as a Spy. When you need to perform this, you’ve probably been recognized as a Spy. You’ve lost your element of surprise and enemies are chasing you. You have 3 ways to solve this problem. The first one is to run towards your teammates. This is the best way to survive if you are close to your teammates. If you are nowhere near your teammates, you have two options. You can either get away with your cloak, reposition yourself and repeat Part 3, or you can kill everyone that know your presence. I recommend the first option for novices, as it is more easy to be executed. Of course, you can return fire before you activate your Dead Ringer. The second option requires precise aiming with you revolver (Especially for the Ambassador) and some knowledge about advanced backstabbing techniques. If you kill all your pursuers, disguise and repeat Part 4. If you fail, stretch your limbs while you wait for your respawn.
NOTE: Enemy Medics can heal you or even Ubercharge you if you are disguised.
The above is about how you should deal with players. But there’s a different story if you need to deal with Engineers and their toys. In this guide, I am also going to explain the best ways to deal with the above two things in different scenarios. But before we dig into the actions, we should have a basic understand of the Sapper first. The Sapper is the Spy’s basic tool for building destruction. The Sapper can be placed on a building for unlimited number of times, and your disguise WON’T be dropped when you place Sappers. The Sapper destroys buildings by first disabling them and slowly draining their health (Which means, placing a Sapper won’t destroy a building immediately). The Sapper can be removed by two wrench hits on the sapped building, or a hit from a Homewrecker or a Maul (Pyro’s melee weapons).
The routine for building destruction is somehow similar to the routine for killing players. What you need to do is to replace the ‘Approach your victim(s)’ part with a ‘Approach the Engineer’s toys’ part, and replace the ‘Stab Stab Stab~’ part with a ‘Stab Sap Sap Sap~’ part or a ‘Sap Stab Sap Sap~’ part. So here’s how it’s done:
Part 4b: Approach the Engineer’s toys’
Decloak as usual, but you should use a Engineer disguise (and take out his wrench) to approach enemy buildings. In that case, the enemies will think that you are going to repair/upgrade the buildings and few of them with suspect you, Switch to your Pistol to pretend that you are spychecking if needed. Never hold your Shotgun out. Mimicking the reload action of the Shotgun/Pistol can be useful too. Just try your best to avoid confrontation in this part. Also, the other thing that you need to be aware is the status of the Engineer (If one is near the buildings). Good Engineers will spycheck everyone that is close to his vicinity when he is not busy. If you have enough health, keep on acting. If not, take out the Dead Ringer and have another go shortly after that. However, if he is busy repairing/upgrading his buildings, you should have no problem approaching him and his buildings. If you can approach the buildings safety, move to the next part. If not, look for the part ‘Survive’.
Part 5b: Stab Sap Sap Sap~ or Sap Stab Sap Sap~ or…
The reason why the topic is not fixed is that you need to act according to the different situations. I will explain some general scenarios, but what you need to actually do depends on the environment, the positioning of the buildings, and the awareness of the Engineer. Also, the scenarios below are only valid if you are in the range of one Sentry, and that is the Sentry that you are going to destroy.
Scenario 1: Buildings up, Engineer not present
This is probably the most easiest way to destroy buildings. What you need to do is to sap the buildings, and stab the Engineer when he comes back and attempts to knock off the Sappers. If you succeed, you’ve probably lost your disguise, and enemies around with chase you down. If that occurs, move to the part ‘Survive’. If not, disguise and continue your operations. This method won’t guarantee building destruction if enemies witness your sapping action and chase you down, as this leaves room for the Engineer to remove your Sappers when you are busying dealing with your pursuers. If enemies chase you down after you place the Sappers, ditch the buildings and save you life. (That is, move to the part ‘Survive’).
Scenario 2: Buildings up, Engineer present
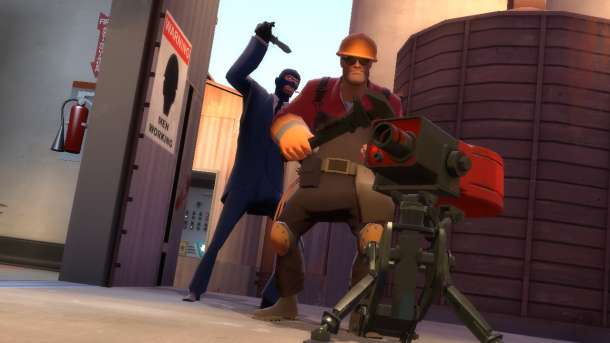
In this part, some techniques are required. Most Engineers will be concentrated on their sentry, in which they will be upgrading/repairing their sentry using the wrench while standing behind the sentry. In this case, you can apply the ‘Stab and Sap’ technique, which means you first backstab the Engineer, before switching to your Sapper and sapping the Engineer’s sentry; this must be done fast enough that the sentry doesn’t have time to turn around and kill you. An experienced Spy may track the sentry’s turning direction and move against it after he stabs (as it will follow him, this will buy him more time). This technique will be easier to perform if you follow my ‘Settings’ recommendations (i.e. Instant weapon switching). However, this technique will fail if the sentry is facing you. In that case, what you need to do is to perform the ‘Sap and Stab’ technique. Sap the sentry, and backstab the Engineer before he can remove your sapper in two wrench hits. This method is recommended only when the ‘Stab and Sap’ technique will probably fail. After sapping the sentry, what you need to do is to sap the remaining buildings. However, there’s no way for you to backstab him, sap his sentry, then kill him immediately with 2 revolver hits (Perfect for Ambassador, 1 headshot and 1 bodyshoot can do the job damn well) before he can remove your sapper. In this stage, if you succeed in backstabbing the Engineer and sapping his buildings, your disguise should be lost and enemies may know your presence. If this occur, more to the part ‘Survive’. If not, disguise and search for you next victim.
Scenario 3: Buildings up, Engineer present, Wrangler on
The Wrangler is a tool that the grants the Engineer the ability to control his sentry gun manually. However, the sentry will be disabled for 3 seconds after wrangling if the Engineer is dead or he put out another weapons. In that case, just perform the ‘Stab and Sap’, and you can actually take your time to sap the sentry, as it will be disabled for 3 seconds before it can be able to fire at you. This is actually a simplified Scenario 2.
The above only applies when you are in the range of one sentry (The sentry that you are going to destroy). So what you should do if you are in the range of two or more sentries? If the sentries are quite far away, perform the trick as usual, before remember to take out the Dead Ringer after you killed a Engineer and placed a sapper on the sentry, as the other sentries will target you once you lost your disguise. However, this will get harder if the sentries are close to each other, as the bullets and rockets will hit you in a shorter period of time. In that case, your best bet is to choose Demoman or Medic. You need to understand that there are some situations where you can’t simply take down the sentries by yourself. However, if there are two sentries and one of them is wrangled, what you need to do is to perform ‘Stab and Sap’ or ‘Sap and Stab’ on the Engineer WITHOUT the Wrangler. In that case, after you lost your disguise, the wrangled sentry won’t target you, and you can destroy the wrangled sentry after that. Just apply ‘Stab and Sap’ or ‘Sap and Stab’ according to the different situations.
Of course, how you should deal with the buildings mainly depends on the situation that you are facing, and the above are only a few examples. You’ll find out that building destruction demands quick decision while inside the enemy territory, and you will be thrilled after you have taken down a rather troublesome sentry. Feel free to experiment by yourself to find a perfect way for you to deal with the toys according to different situations.
NOTE: You can leech health and ammo from enemy dispensers and you can take enemy teleporters if you are disguised.
Section 6: Advanced Stuff and Techniques
There are quite a number of backstabbing techniques, including:
Stairstab: Stand at the top of a set of stairs, facing down at an enemy approaching you. Run forward and jump, turning in mid-air to stab them in the back or on top of them (Recommended). This technique can be difficult to master, but it is also difficult to protect against, as the enemy has to turn almost completely around to avoid it. More experienced players will either avoid climbing or back up out of range when they see a Spy at the top of the stairs. Instead of advertising your intent, you can perform the stab without having to wait at the top. While retreating up the stairs, jump up and hold back. Most players will continue to run forward, passing underneath you. Backstab them as you land. Not recommended if you are going to Stairstab an enemy spy. He can Ass-stab you easily. (For the ‘Survive’ part)
Quickstab: While an enemy is running towards you, let them run past you before spinning and stabbing their retreating back. The successful rate for this technique mainly depends on your ping. (For the ‘Approach your victim(s)’ part)
The Corner stab : This is an advanced Spy technique. The technique involves luring an enemy to a corner, then you immediately back out and stab the enemy as he turns in the way you did. Note that this will only work once or twice on an enemy, will not work against Heavies, Soldiers and Demomans. Best used on pursuits with Pyros, Medics, Engineers, Demoknights and melee-wielding Snipers. (For the ‘Survive’ part)
The Topstab: Sometimes Engineers will place their sentry and dispenser in a fashion that allows the Engineer to have his back to a corner, making him seemingly protected from backstabs. It is possible to jump on this Engineer’s head and move your aim around his back until you get the “ready to backstab” animation from your knife, allowing you to score a backstab while standing on his head. (For the ‘Stab Sap Sap Sap…’ part)
The Dropstab (or Eagle stab): this is a similar to a stairstab, but instead it focuses on striking enemies from the least awaited angle (usually from ground above the opponent – bridges and similar above main paths on several maps are ideal for this purpose). As the enemy passes beneath the spot jump after them and stab them in the back or on top of them (Recommended). Attempting to dropstab the same opponent at the exact same spot twice is always a bad idea (doing it again elsewhere is more secure, though he might be paranoid) – this tactic may also be used as a distraction, just do a ninja-stab somewhere, go somewhere else and change tactics. The result is quite often that your opponent will extensively spycheck the area he got backstabbed in. (For the ‘Approach your victim(s)’ part)
The Matador stab: This is an advanced Spy technique and a difficult one to master. To perform it, you must be facing a single enemy, who is facing you. Either run towards him or let him approach you, then, just before he is in melee reach, strafe in one direction (left or right) for a split second, before quickly changing direction and strafing to the opposite side. This will reveal the enemy’s back for a very short moment as he follows your first strafe, and you should stab him promptly during this brief gap. This is useful for those players that dismiss Spies and try to melee them, such as some Scouts, Demoknights, Melee-wielding Medics, Snipers and Engineers. Should this technique fail, and you miss the stab, you will be extremely vulnerable in close-range and will almost certainly die, but when performed correctly, this technique enables you to stab an enemy in a potentially fatal situation. Great for Dead Ringer Spies. Not recommended to try this on Pyros, the technique might still work, but unless the Pyro wants to melee you, you will probably be set alight and dealt a fair share of damage. (For the ‘Survive’ part)
The Ass-stab: This is best used if someone from above jumps down and tries to take you out. Normally, they will jump down on your current position. What you need to do is to step back for a bit when you potential victim is jumping down. After that, you just aim up and stab his ass/back when he is landing in front of you. Best used if your pursuer hates you. (For the ‘Survive’ part)
~~~~~~~~~~~~~~~~~~~~~~~~~~~~~~~~~~~~~~~~~~~~~~~~~~~~~~~~~~~~~~~~~~~~
Well, this is the end of this guide, feel free to ask me questions. Here, I want to deliver my most sincere thanks to Necro for providing me some ‘invaluable resources’ that improves my Spy a lot.
The ‘invaluable resources’
If you want to know the Spy in depth:
http://wiki.teamfortress.com/wiki/Spy
A video showing some ‘Stab and Sap’ and basic Spy skills:
http://www.youtube.com/watch?v=b-qD30EOO-o
Ahh… Stabby… Featuring a God-like Spy:
http://www.youtube.com/watch?v=nQd8Q0MaxWg&feature=related
Make sure to watch his other videos.
This is the end. Happy Stabbings!


4 Comments
Wow. First post Billie! That's such a nice comprehensive guide. My favorite class has never been Spy, but this surely ignited my interests :P
on June 15, 2012 18:21:50
Decent post is always decent Even through I do play spy often, the things mentioned are so detail and useful that I will revise it regularly like my books. Nice job Billie
on June 15, 2012 18:31:46
Thank you for your support. A Medic Guide will come out shortly. (After my exam I think)
on June 15, 2012 23:16:59
Give some examples of FAIL SPIES so that people will not make the mistakes.
on June 29, 2012 18:06:28